

This Mother\’s Day, give mom an innovative gift that will both pamper and entertain. Making DIY soap is a fun bonding activity with endless options for customization. Find out how you can start blending your own luxurious lather.
The art of soap making has been around for centuries, and the practice remains relatively simple. Not only is it a lot of fun, but soap making is also a great hobby and a way to make gifts—or a treat for yourself.
Special occasion soaps
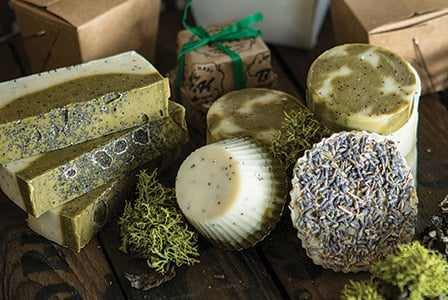
Handcrafting a batch of soap with your mom is a memorable Mother’s Day activity, especially if you incorporate dried lavender flowers or bergamot and ylang ylang essential oils. Gifting soap infused with some of Dad’s favourite scents (such as peppermint or coffee) is a thoughtful way to mark Father’s Day next month. For any occasion, the citrus-mint soap recipe below is sure to be a hit—and the ingredients will likely cost you under $40.
Most basic soap ingredients can be found in your kitchen, garden, or local health food store. Oils help create the soap base, while natural additions such as ground herbs and spices, pure essential oils, dried flowers, seeds, and salts can be added for custom colours, fragrances, and exfoliation. By using natural ingredients in your soap making, you can create luxurious lathers that are gentle on your skin and the environment.
Tip: Soap cannot be made without lye, and most of us don’t have pure lye on hand (unlike other soap ingredients). Some suppliers in Canada, many of whom will ship elsewhere, include
In British Columbia
- Homesteader’s Emporium (homesteadersemporium.ca)
- The Soap Dispensary (thesoapdispensary.com; in-store only)
- Voyageur Soap & Candle (voyageursoapandcandle.com)
In Alberta
- Creations from Eden (creationsfromeden.com; online only)
In Ontario
- Canwax Candle & Soap Making Supplies (canwax.com)
What is cold process soap?
Cold process soap is made from combining lye (sodium hydroxide or NaOH) with vegetable oils and/or animal fats in a process called saponification. Heat is only used to melt the oils. The resulting soap solid can be gentler on skin than synthetic soaps, which are often made with petroleum-based oils and other man-made products and can cause dryness and irritation.
Tools of the trade
- accurate kitchen scale and measuring cup
- immersion blender
- cooking thermometer
- large stainless steel pot
- freezer paper or butcher’s paper
- non-reactive spatulas or spoons
- non-reactive bowls
- soap moulds
- lid for soap moulds (optional)
- metal coat hanger or paperclip
- towel or blanket
- cooling rack
Safety First
Although soap making is a relatively easy undertaking, we need to employ safety measures. Lye is caustic and can lead to accidental burns or even blindness if not handled properly. These precautions may seem a little daunting, but they’re actually very easy. To protect yourself
- Ensure all tools, ingredients, and curing soaps are kept safely away from children or pets. Soap is safe to handle after curing for 24 hours.
- Use mixing bowls and utensils made from non-reactive materials (materials that will not undergo a chemical reaction with the highly alkaline lye). Choose stainless steel or tempered glass. Copper and aluminum should be avoided.
- Consider designating tools for soap making only. Tools should only be reused for cooking if they have been properly cleaned after soap making.
- Prepare a neutralizing bath of 1 part white vinegar and 1 part water to neutralize lye spills.
- Wear eye protection such as safety goggles or glasses when handling lye and raw soap.
- Protect your hands with thick rubber or waterproof gloves.
- Cover skin with clothing and wear closed-toe shoes.
- Mix lye and distilled water outside or in a well ventilated area and on a heat-resistant surface.
- Protect work surfaces with cardboard, layered newspaper, or an old towel.
Citrus-Mint Soap with Poppy Seeds
Yield approximately 4 lb (1.8 kg)
For best results, use a kitchen scale to weigh ingredients listed in ounces.
Before you begin
Using a large non-reactive bowl (see “Safety First”), prepare a vinegar bath by combining 3 cups (750 mL) white vinegar with 3 cups (750 mL) water. This will be used for neutralizing lye spills and anything that comes into contact with lye, including utensils.
Basic soap
2 cups (500 mL) distilled water (do not use tap water as it may contain other chemicals)
7.1 oz (200 g) sodium hydroxide/NaOH (lye)
2 cups (500 mL) olive oil
15.8 oz (450 g) coconut oil
16.75 oz (475 g) tallow or palm oil
0.4 oz (10 g) beeswax
Natural additions
2 Tbsp (30 mL) pure citrus essential oil such as lemon, lime, orange, tangerine, grapefruit, or d-limonene
2 Tbsp (30 mL) pure mint essential oil
2 Tbsp (30 mL) poppy seeds, divided
2 Tbsp (30 mL) spirulina powder
Directions
- Line soap moulds with freezer paper or butcher’s paper, shiny side up. (Do not use wax paper; it will stick to the soap.) This step is not required for silicone moulds.
- Wearing eye protection, gloves, apron, and covered shoes, move outside or to a well-ventilated area. Slowly add lye to distilled water (not water to lye) in a non-reactive bowl, exercising caution as this chemical reaction will create fumes and heat. Avoid inhaling fumes. Stir continuously until lye has dissolved. Set lye-water aside to cool. Rinse stirring utensil in vinegar bath immediately.
- Combine olive oil, coconut oil, tallow or palm oil, and beeswax in a large stainless steel pot over medium heat and stir until solids have fully dissolved. Remove from heat.
- Using kitchen thermometer, monitor oils’ temperature, testing every couple minutes until oils have cooled to 130 F (54 C). To cool oils more rapidly, place pot in sink filled with 2 to 3 in (5 to 7.5 cm) cold water and ice. Stir oils regularly to ensure temperature remains consistent throughout the mixture during cooling process.
- Once oils have cooled to 130 F (54 C), add lye-water to oils and combine using 30 second blasts of immersion blender. Stir with spoon or spatula between blasts to ensure all ingredients mix well. Push down any bubbles as they appear. Continue blast/stir process for approximately 2 to 3 minutes, or until trace is reached.
- Add essential oils and approximately 1 Tbsp (15 mL) poppy seeds and stir well with spoon or spatula.
- Separate half of mixture into second bowl. Add spirulina and 1/2 Tbsp (7 mL) poppy seeds to that half only. Mix until a consistent green colour is achieved.
- Pour uncoloured soap into prepared soap moulds until each mould is approximately half full. Carefully spoon coloured soap mixture over uncoloured soap to create two separate layers.
- You can either leave soap layers as they are or create swirl patterns by dragging the corner of a metal coat hanger in an up and down motion from one end of the mould to the other. For smaller moulds, use a paperclip. Mix minimally to retain contrast between soap colours. Sprinkle remaining 1/2 Tbsp (7 mL) poppy seeds evenly over soap.
- Cover moulds with airtight lid, freezer paper, or butcher’s paper, and press onto soap surface to prevent exposure to air during curing stage, which can cause discolouration.
- Insulate with towel or blanket and leave undisturbed for 48 hours.
- After 48 hours, remove soap from moulds and inspect soap surfaces for white powdery substance known as soda ash. Remove soda ash by wiping soap with a damp cloth, or simply cut it away before cutting soap into bars of your desired size.
- Arrange soaps on rack with space between each bar to allow for air circulation. Cure in cool, dry, dark area. Soap is best enjoyed after curing for 4 to 6 weeks.
What is trace?
When the oils and lye-water have mixed to the point where they will not separate, trace has been reached. This is also known as emulsification. Trace is identified by a pudding-like consistency. To test for trace, dip a spatula or spoon into the mixture and dribble a small amount back into the pot. If it sits on the surface for a few seconds before disappearing back into the mixture, trace has been reached.
Clean-up
Any tools that have come into contact with lye or lye-water should be dipped in the vinegar bath before cleaning. For everything else, scrape off any residual soap mix, then wipe clean with a vinegar-soaked rag. Clean all tools thoroughly using a mixture of water, dish soap, and 1 cup (250 mL) white vinegar. Alternatively, keep tools in a safe place away from pets and children and wait 24 hours before cleaning. After 24 hours, soap is safe to touch and can be cleaned away with dish soap and water.
Shape your soap
Soap has traditionally been made into bars, but how you shape your soap is only limited by your imagination.
- Make round, puck-like soaps with an upcycled juice container or PVC plumbing pipe, which can often be sourced for free in the off-cuts bin at your local hardware store.
- A bread tin yields traditional square or rectangular soap loaves.
- Silicone bakeware comes in a variety of forms including cupcakes, characters, and seasonal shapes.
- Upcycling small paper takeout boxes is another great soap mould solution as they have a non-stick coating and can be used as packaging, too. Simply pour and cure your soap directly in the box.
